Blog Entries
- Novedades de SitecoreAI Agentic Studio (marzo de 2026)
 Si febrero sirvió para afinar Agentic Studio, marzo parece ser la actualización en la que Sitecore lo acerca mucho más al trabajo real de producción. El enfoque es bastante claro: trabajar directamente sobre contenido, hacer más prácticos los agentes personalizados y convertir los espacios en un entorno… Read more: Novedades de SitecoreAI Agentic Studio (marzo de 2026)
 - Serving AI-Ready Markdown from Sitecore XP 10.4 MVC
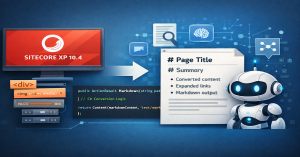 As more teams start building AI assistants, retrieval workflows, and search experiences on top of CMS content, one practical question keeps coming up: How do we expose Sitecore content in a format that’s easy for AI systems to consume? In many cases, the answer is Markdown. Markdown… Read more: Serving AI-Ready Markdown from Sitecore XP 10.4 MVC
 - Using Markdown with Sitecore XP and XM
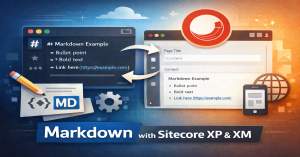 Markdown isn’t new, but it keeps earning its place. It’s fast to write, easy to read, and plays well with modern development workflows. If you’re working with Sitecore XP or XM, Markdown can be a practical alternative to rich text fields, especially for developer-friendly teams or content… Read more: Using Markdown with Sitecore XP and XM
 - Building a Custom Sitecore RenderField Processor to Validate Internal Links in RTE Fields
 Broken internal links are one of those problems that quietly pile up in a Sitecore solution. Editors paste content, pages get renamed or moved, and suddenly your rich text fields are full of links that no longer go anywhere. Sitecore doesn’t validate internal links at render time… Read more: Building a Custom Sitecore RenderField Processor to Validate Internal Links in RTE Fields
 - Sitecore Workshop USFQ
 El viernes 21 de noviembre de 2025 fue una fecha especial para los estudiantes de Ingeniería en Sistemas de la Universidad San Francisco de Quito. Ese día, el SUGLATAM presentó un Workshop impartido por Ramiro Batallas y Gabriel Baldeón. El objetivo no fue solo compartir información, sino… Read more: Sitecore Workshop USFQ
 - Sitecore Symposium Insights
 Marketplaces, Machines, and Momentum: The Real Story from Sitecore Symposium Introduction Sitecore Symposium has always been a temperature check on the state of digital experience. This year’s vibe was different. The center of gravity shifted decisively from “individual products” to “a platform you extend.” The signals were… Read more: Sitecore Symposium Insights
 - What’s New in Sitecore Stream: Smarter Imports, Smarter Images
 Sitecore Stream keeps picking up momentum. What began as an AI assistant for content creation now reaches further into the nuts and bolts of content operations—how content gets ingested, structured, and enriched before anyone hits “publish.” Two recent releases—1.3.23 and 1.4.54—are key markers on that path: This… Read more: What’s New in Sitecore Stream: Smarter Imports, Smarter Images
 - Sitecore and Core Web Vitals. Changing the client cache
 Introduction In the modern digital landscape, website performance is not just a nice-to-have—it’s a business-critical factor. Google’s Core Web Vitals (CWV) have shifted the way developers, marketers, and architects think about web optimization. These metrics—Largest Contentful Paint (LCP), First Input Delay (FID), and Cumulative Layout Shift (CLS)—play… Read more: Sitecore and Core Web Vitals. Changing the client cache
 - Creating Language Versions Using Sitecore Stream in Sitecore XPTable of content Introduction Understanding Multilingual Management in Sitecore XP Deep Dive into Sitecore Stream Setting Up the Environment Step-by-Step: Creating Language Versions Translation & Localization Workflows Troubleshooting & Pitfalls Best Practices & Governance Advanced Use Cases Conclusion Introduction Why Multilingual Content Is No Longer Optional Today,… Read more: Creating Language Versions Using Sitecore Stream in Sitecore XP
- Install Sitecore Stream in a Local Sitecore InstanceSitecore Stream introduces a modern, real-time, event-driven architecture to the Sitecore ecosystem, enabling more scalable and reactive digital experiences. While it’s built to thrive in the cloud, developers often want to test it locally, especially in Experience Platform (XP) environments. This blog post walks you through how… Read more: Install Sitecore Stream in a Local Sitecore Instance
- Sitecore Stream over XP and XMSitecore Stream is a new SaaS-based Digital Asset Management (DAM) and Content Hub capability designed to enhance content delivery pipelines. When integrated with Sitecore XP (Experience Platform) and Sitecore XM (Experience Manager), Stream enables headless, cloud-native content streaming, especially for modern composable DXP scenarios. What is Sitecore… Read more: Sitecore Stream over XP and XM
- Work around with Docker 4.41.1 and Sitecore running in containersA few days ago, Docker released the new desktop version 4.41.1, but it looks like this release introduces a bug because the npipe volume type was not added to the enumerator. This bug produces something like this when you try to run your local containers Here is… Read more: Work around with Docker 4.41.1 and Sitecore running in containers
- Working with projects in Sitecore StreamSitecore Stream is an AI-driven orchestration layer designed to enhance digital experience management by integrating generative AI capabilities directly into Sitecore’s suite of composable digital experience platform (DXP) products. It aims to streamline marketing workflows, ensure brand consistency, and accelerate content creation and delivery. What is Sitecore… Read more: Working with projects in Sitecore Stream
- Migrate Sitecore headless site to XM Cloud
 In this new era where cloud computing is common, we want to save resources and time managing our apps, and all new front-end frameworks are capable of doing a lot of things, this is where we use “Headless” applications. Since Sitecore released the JSS version of their… Read more: Migrate Sitecore headless site to XM Cloud
 - Create custom tokens for the content editorSometimes we have to use custom tokens in the standard values to accomplish the requirement, in this article, we are going to create a new variable replacer to add our custom tokens Let’s follow up on these next steps to do it. In your project, create a… Read more: Create custom tokens for the content editor
- Add an additional database to your Sitecore instanceSometimes we need to add a new database in our Sitecore instance, so let’s see how to do it The very first step is to add an additional database to the SQL Server with the same DB schema as Sitecore web database Then, add the custom connection… Read more: Add an additional database to your Sitecore instance
- Setting up custom placeholders in the layout serviceUsually, we need to create components, such as containers, to place other components and display our content in a structured way. So let’s create a two columns component, this gonna be created as we usually do: As you realize, I’m using placeholders to define how the components… Read more: Setting up custom placeholders in the layout service
- Retrieving child items using GraphQLIf you’re thinking of creating a new menu navigation for your website, here is an easy way to do it using headless with Next.js. So, the first thing to do is create the model for each item and the menu. Now, the step is to define an… Read more: Retrieving child items using GraphQL
- Adding variants to your headless SXA component with Next.JSIn my last blog post, I talked about how to implement a new component so, doing the same steps, but now I will add some extra ones to create variants of the same component. So to add a new variant you must repeat the same process in… Read more: Adding variants to your headless SXA component with Next.JS
- Implementing a new component in Headless SXA and Next.jsImplementing a new component in our Next.JS application with Headless SXA differs greatly from our traditional MVC Sitecore solution. As you know, in the traditional MVC solution, we mainly use “View Renderings” or “Controller Renderings” depending on the requirement. So for Next.JS, we need to use a… Read more: Implementing a new component in Headless SXA and Next.js
- Implementing Next.js application with Sitecore SXA HeadlessTo work with the Sitecore Next.js version you must have installed the following pre-requisites: and we have to have defined previously the API key in Sitecore inside this path /sitecore/system/Settings/Services/API Keys So, with the next steps you can initialize your front-end application: then follow the instructions and… Read more: Implementing Next.js application with Sitecore SXA Headless
- Configure Headless SXA in Sitecore StandaloneI know is simple when you are using docker because it comes already configured and ready to work with, but in some projects, we do not have the luck of using it. So let’s see how to do it manually. In this example, I’m gonna use Sitecore… Read more: Configure Headless SXA in Sitecore Standalone
- Using package references in your Sitecore ProjectPart of the upgrade in a Sitecore project is to remove the package.config file and change the way how we handle all Sitecore references. So, let’s follow these steps: Ok, so until here isn’t a big deal, right? So let’s do the following in the project At… Read more: Using package references in your Sitecore Project
- Take out Gulp from the Helix Solution
 One of the critical things when we do an upgrade to our Sitecore Instance is to upgrade the code and the helix structure in the solution. So, I will describe the primary topics that everyone has to keep in mind in the upgrade process: Remove Gulp Files… Read more: Take out Gulp from the Helix Solution
 - Fixing Sitecore 10.1.0 installation in Windows 11 and SQL Server 2022In this topic, I’m going to explain how to fix the installation process for the prerequisites and Sitecore. Prerequisites Since Microsoft deprecated the link for Web Platform Installer, we need to modify it with the new one, following these steps: it should look like this: Now, you… Read more: Fixing Sitecore 10.1.0 installation in Windows 11 and SQL Server 2022
- Delete Custom Items in Sitecore Solr
 Following with my latest post about Add Custom Items to Sitecore Solr here I’m gonna explain how to delete those custom items. The first step is Querying those items Once you get the list of items, let’s go to the delete process Why use IndexCustodian instead of… Read more: Delete Custom Items in Sitecore Solr
 - Add Custom Items to Sitecore SolrSometimes we need to create a custom crawler in our solution in order to add custom items in our solr index that are not part of our Sitecore instance, for example, read an external API and add those results in the index. Ok, reading the API is… Read more: Add Custom Items to Sitecore Solr
- Upgrade Sitecore.CLI in Sitecore 10.2 JSS with Docker
 In order to migrate to Sitecore.CLI 5.2.109 or greater over docker, we need to do the following steps: SITECORE CLI Open the backend folder project with a power shell terminal Run the following command: Then, after the upgrade is done run the following command for initializing the… Read more: Upgrade Sitecore.CLI in Sitecore 10.2 JSS with Docker
 - Install Dianoga tools in SitecoreDianoga is a very helpful tool that allows us to compress images and use the new image formats in our Sitecore site. For installing it, we can do it manually or using a project in our Sitecore solution. In the solution, we need to add the nugget… Read more: Install Dianoga tools in Sitecore
- Customizing the initialization scriptWhen we work with Docker and Sitecore, especially on a big project, is usual to have a lot of templates, components, and configurations that are serialized but take a lot of time to be ready each time when we up all containers. So, here are the steps:… Read more: Customizing the initialization script